
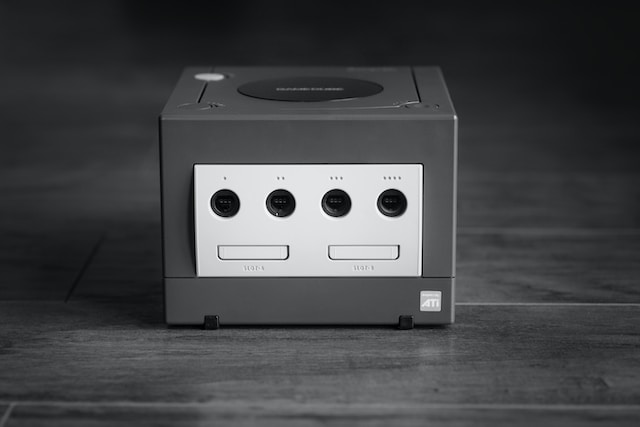
GameCube Disc Not Spinning
There are a few reasons why your GameCube disc might not be spinning. Here are some of the most common causes and how to fix them: The disc drive is dirty. The laser is dirty or damaged. The potentiometer is adjusted incorrectly. The disc is scratched or damaged. If the disc is scratched or damaged, it might not spin. In this case, you’ll need to replace the disc.

Is A GameCube Easy To Repair?
Before we delve into the repairability aspect, let’s first understand the design and components of the Nintendo GameCube. The console was first released in 2001 and featured a compact, cubic shape with a handle that made it easily portable for gaming on the go. It utilized proprietary optical discs, known as GameCube discs, for gaming.
Inside the GameCube, you’ll find essential components like the central processing unit (CPU), graphics processing unit (GPU), memory, controller ports, and power supply. The console also includes a cooling system to prevent overheating during prolonged gaming sessions.
Common Issues Faced by GameCube Owners
Over the years, some common issues have been reported by GameCube owners. These issues might include:
Disc Read Errors
One of the primary problems faced by GameCube users is disc-read errors. This issue can occur due to a dirty or damaged optical lens, scratched discs, or problems with the disc drive itself.
Controller Problems
Controllers are an integral part of the gaming experience, and issues with them can be frustrating. Problems like unresponsive buttons, stick drift, or loose connections are among the most common complaints.
Power and Video Issues
Sometimes, the GameCube may fail to power on or display video output. Faulty power supplies, damaged AV cables, or issues with the motherboard might be the culprits.
Overheating
As with any electronic device, overheating can pose a problem for the GameCube. Dust buildup or malfunctioning cooling fans can lead to overheating, resulting in sudden shutdowns.
The Repair Process: Is It Easy or Challenging?
Now, let’s address the primary question: Is a GameCube easy to repair? The answer lies in the complexity of the issues and your technical expertise. Some minor problems, such as disc read errors due to dirt or minor scratches, can be resolved relatively easily.
For instance, cleaning the optical lens can often resolve disc-read errors. You can use a soft, lint-free cloth and isopropyl alcohol to gently clean the lens. Additionally, replacing damaged AV cables can restore video output. These tasks require minimal technical skills and can be accomplished by following online guides or tutorials.
However, certain issues might be more challenging for novice repairers. For example, addressing internal hardware problems like a faulty motherboard or cooling system requires more technical knowledge and expertise. In such cases, seeking professional repair services or assistance from experienced individuals is recommended.
DIY GameCube Repair Tips
If you’re determined to tackle some common GameCube issues on your own, here are some helpful tips:
Properly Cleaning the GameCube
Dust and debris can accumulate inside the console over time, leading to performance issues. Regularly cleaning the GameCube’s exterior and interior with compressed air can prevent overheating and other problems.
Controller Maintenance
To keep your controllers in good working condition, avoid excessive force during gameplay and store them in a clean, dry environment. If you encounter stick drift, there are tutorials available online to guide you through the process of cleaning or replacing the analog stick.
Troubleshooting Disc Read Errors
If your GameCube struggles to read discs, try cleaning the discs with a soft cloth and water. If that doesn’t work, consider using a commercial disc cleaning kit. For more stubborn issues, you may need to consider replacing the disc drive with a new one.
Overheating Prevention
Ensure that your GameCube is well-ventilated and free from obstructions. If necessary, you can apply new thermal paste to the CPU and GPU to improve heat dissipation.
Why Does My GameCube Disc Stop Spinning?
We, as experts in gaming and troubleshooting, will delve into the reasons why your GameCube disc might stop spinning and provide you with effective solutions to resolve the issue. Let’s dive right in!
Dirty or Damaged Disc
One of the most common reasons behind a GameCube disc’s sudden halt is a dirty or damaged disc. Dust, fingerprints, or scratches on the disc’s surface can disrupt the smooth spinning motion, causing the console to stop reading the data. To remedy this problem, clean the disc gently using a soft, lint-free cloth, wiping from the center outwards in straight lines. Avoid using abrasive materials that could worsen the scratches. If the disc is significantly damaged, consider replacing it with a new copy.
Optical Drive Malfunction
The optical drive of your GameCube is responsible for reading the data from the disc and initiating the spinning motion. If this component malfunctions, it can lead to the disc stopping unexpectedly. In such cases, contact a professional technician to inspect and repair the optical drive. Avoid attempting to fix it yourself, as it could lead to further complications.
Console Overheating
An overheating GameCube can also be the culprit behind the disc stoppage. When the console’s internal temperature rises excessively, it may shut down or pause operations to prevent damage. Ensure that your GameCube has proper ventilation and isn’t placed in enclosed spaces or near heat-emitting devices. Consider investing in a cooling stand to improve airflow and maintain an optimal gaming environment.
Outdated Firmware
Outdated firmware can lead to compatibility issues between the GameCube and newer game discs. The console may fail to recognize the disc or experience spinning interruptions due to this disparity. To address this, check for firmware updates from Nintendo’s official website or use the built-in update feature on the GameCube if available.
Controller Interference
Sometimes, external factors like wireless devices, smartphones, or other controllers can cause interference with the GameCube’s signal reception, leading to disc stoppages. Keep these potential sources of interference away from your console during gameplay to maintain a smooth gaming experience.
Internal Hardware Problems
In more severe cases, internal hardware problems could be the reason behind the spinning issue. Issues with the motherboard, power supply, or other vital components may cause the GameCube to malfunction. In such instances, it’s best to seek professional repair services to diagnose and fix the underlying hardware problems.
Corrupted Memory Card
A corrupted memory card can also impact the disc’s spinning behavior. If the console struggles to read data from the memory card, it may pause the spinning process. Try using a different memory card or formatting the existing one to see if that resolves the problem.
Overloading the Console
Running too many applications or using other peripherals simultaneously can strain the GameCube’s resources, leading to spinning interruptions. Make sure to close unnecessary applications and disconnect any peripherals not in use while gaming to optimize performance.
How Do I Fix My GameCube Disc?
If you find yourself struggling with a faulty GameCube disc, you’re not alone. As avid gamers, we understand the frustration that arises when our beloved gaming experience is hindered by disc-related issues. Fear not, for we are here to guide you through the steps to fix your GameCube disc and get you back to enjoying your favorite games without any disruptions.
Why is My GameCube Disc Not Working Properly?
Before we delve into the solutions, it’s essential to understand why your GameCube disc might not be working as expected. Several factors could contribute to this problem:
- Scratches on the Disc: Over time, GameCube discs can accumulate scratches from regular use, mishandling, or storage in inappropriate conditions. These scratches can interrupt the data read process, causing the game to freeze or crash.
- Dirt and Dust Buildup: Dust and dirt particles can find their way onto the disc’s surface, affecting the laser’s ability to read the data accurately.
- Disc Misalignment: Sometimes, the disc may become misaligned within the console, leading to reading errors.
- Console Issues: In some cases, the problem may not lie with the disc itself but with the GameCube console. Software or hardware malfunctions can impact disc performance.
How to Fix Your GameCube Disc
Step 1: Clean the Disc
The first and most straightforward step in troubleshooting a problematic GameCube disc is to clean it thoroughly. Follow these steps:
- Gather Supplies: You’ll need a microfiber cloth, water, and mild dish soap.
- Wash Your Hands: Before handling the disc, make sure your hands are clean to avoid transferring more dirt onto it.
- Moisten the Cloth: Dampen the microfiber cloth with a mixture of water and a small amount of mild dish soap.
- Wipe Gently: Gently wipe the disc from the center outward, avoiding circular motions. Rinse the cloth if necessary.
- Dry Completely: Use a dry section of the microfiber cloth to ensure the disc is completely dry before reinserting it into the console.
Step 2: Remove Scratches (for Minor Scratches)
If your GameCube disc has minor scratches that are affecting its performance, you can try the following methods to remove them:
- Toothpaste Method: Apply a small amount of non-gel toothpaste to the scratched area. Using a soft, lint-free cloth, gently rub the toothpaste onto the scratches in a straight motion. Rinse the disc and let it dry.
- Banana Method: Yes, you read that right! Bananas contain natural oils that can fill in minor scratches. Rub the banana over the disc’s surface, and then wipe it clean with a soft cloth.
Step 3: Adjust the Laser Lens
If cleaning and scratch removal don’t solve the issue, the problem may lie with the laser lens. Here’s how to adjust it:
- Power Off: Turn off your GameCube and unplug it from the power source for safety.
- Open the Console: Use a screwdriver to carefully open the GameCube console.
- Locate the Laser Lens: The laser lens is a small, clear plastic component. You can typically find it near the disc tray.
- Adjust the Potentiometer: With a small screwdriver, gently turn the potentiometer clockwise slightly. This may help improve the laser’s performance.
- Reassemble the Console: Put the console back together, ensuring everything is properly aligned.
Step 4: Check for Console Updates
Sometimes, the issue might be related to outdated firmware or software glitches. Follow these steps to check for updates:
- Connect to the Internet: Make sure your GameCube is connected to the internet (if applicable) or insert a disc with the latest firmware update.
- Access System Menu: Turn on your GameCube and access the main menu.
- Check for Updates: Navigate through the menu to find the “System Update” or “Firmware Update” option and follow the on-screen instructions to update your console.
FAQ’s
Why is my Gamecube disc not spinning when I insert it?
There could be several reasons for this issue. It might be due to a faulty disc drive motor, a dirty or misaligned laser lens, or a problem with the system’s power supply. Further troubleshooting is needed to pinpoint the exact cause.
Can I fix the disc spinning issue myself, or should I seek professional help?
If you’re experienced with electronics and have some knowledge of console repair, you can attempt to fix the issue yourself. However, if you’re unsure about what to do or lack technical skills, it’s better to seek professional repair services to avoid causing further damage.
Is there a way to determine if the problem lies with the Gamecube console or the game disc itself?
Yes, you can try inserting different game discs into the console to see if the issue persists. If none of the discs spin, it likely indicates a problem with the console. If only a specific disc is affected, it might be a problem with that particular game disc.
My Gamecube console is making strange noises when I try to play a game. What should I do?
Unusual noises, such as grinding or clicking sounds, usually indicate a hardware problem. It’s best to turn off the console immediately to prevent further damage and seek professional repair or follow troubleshooting guides from reputable sources to identify and fix the issue.
Can a dirty disc be the reason behind the disc not spinning properly?
Yes, a dirty or scratched disc can cause the console’s laser lens to have difficulty reading the data, which may result in the disc not spinning. Clean the disc gently using a soft, lint-free cloth and try again. If the problem persists, it might be an internal console issue.
Is it possible to replace the disc drive on a Gamecube by myself?
Yes, it is technically possible to replace the disc drive on a Gamecube if you have the right tools, a replacement drive, and the necessary technical skills. However, this process can be challenging and may void any remaining warranty, so proceed with caution. If you’re unsure, consider seeking help from professional repair services.


