How To Record Your Gameplay Like a Pro with Wondershare DemoCreator
Recording your gameplay like a pro is not just about hitting the record button; it’s about creating captivating content that engages your audience and showcases your gaming skills. Whether you’re streaming on Twitch, creating YouTube videos, or simply recording for personal enjoyment, mastering the art of gameplay recording can elevate your gaming experience to new heights. In this guide, we’ll explore essential tips and techniques to help you record your gameplay like a pro, from choosing the right software to engaging with your viewers. Whether you’re a beginner looking to get started or a seasoned gamer aiming to enhance your recordings, this guide has something for everyone. So, let’s uncover the secrets to recording your gameplay like a pro.
Welcome to the world of gaming content creation! We’ll introduce you to Wondershare DemoCreator, a comprehensive screen recorder designed for game recording with ease.
With DemoCreator, you can capture every thrilling moment of your gaming sessions and transform them into polished, professional-quality videos that captivate your audience. From game recorder adding effects, annotations, and transitions, DemoCreator offers all the tools to unleash your creativity and elevate your gaming content to the next level. So, let’s dive in and discover how DemoCreator can help you become a pro at recording and editing gameplay videos.
Steps on How to Record a Game with Wondershare DemoCreator
Creating captivating gameplay videos with Wondershare DemoCreator is a breeze. Follow these simple steps to produce professional-quality content that will impress your audience.
Step 1: Launch Wondershare DemoCreator
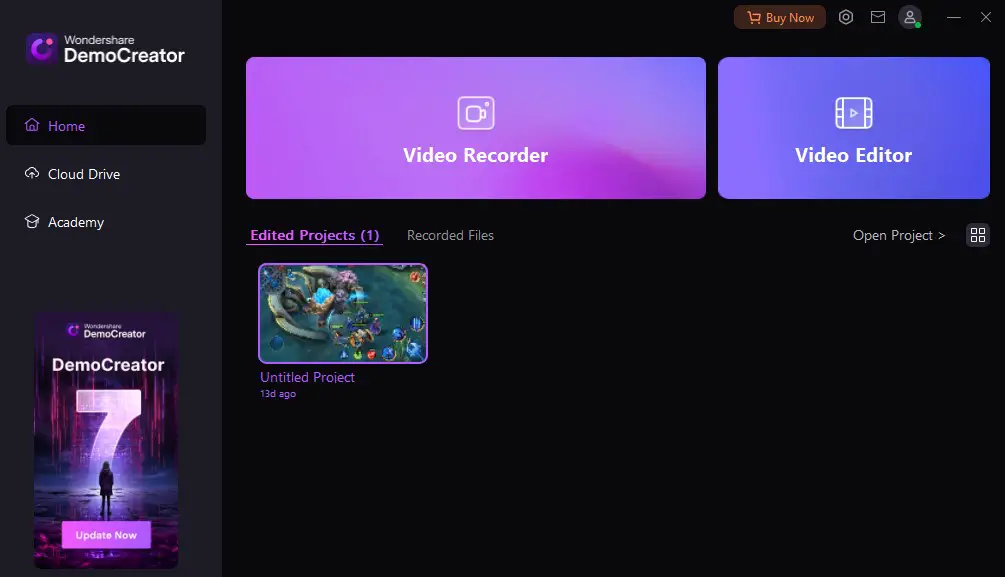
Alt Text: wondershare democreator home
Launch the application on your computer to begin your journey with Wondershare DemoCreator.
Step 2: Setting Up Your Game Recording
Configuring Wondershare DemoCreator for game recording is essential to ensure you capture the best possible footage.
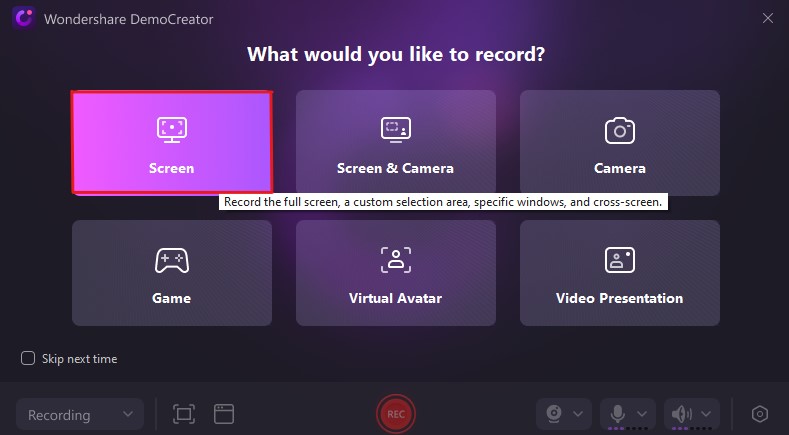
Selecting the Game Window. Identify the game window you intend to record. Launch your game and ensure it’s displayed on your screen. In Wondershare DemoCreator, click the “Video Recorder” tab and choose “Screen” to select the game window as your recording area.
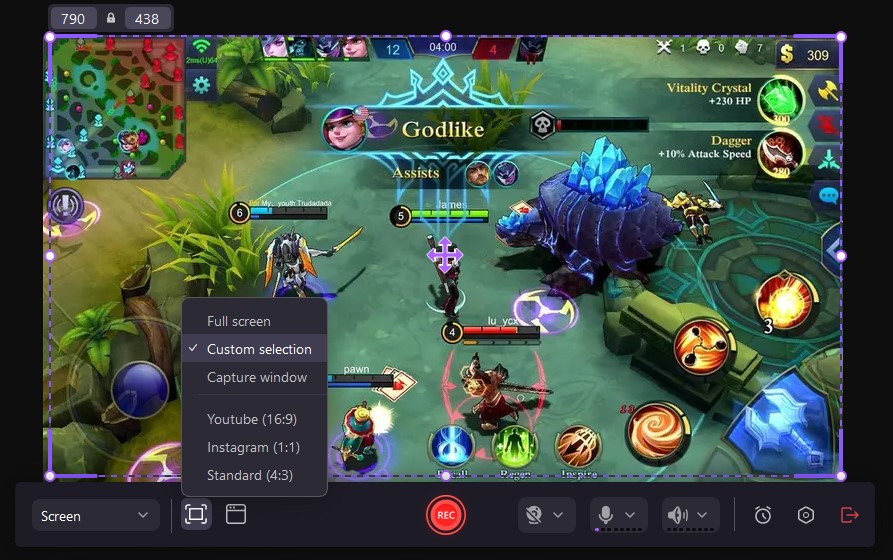
Adjusting Recording Settings. Navigate to the recording settings within Wondershare DemoCreator to customize your recording preferences. You can adjust parameters such as resolution, frame rate, and audio input settings to ensure optimal quality for your gameplay footage.
Optimizing Performance. To guarantee smooth recording without interruptions, optimizing your computer’s performance is essential. Close any unnecessary background applications that may consume system resources.
Step 3: Capturing Your Gameplay
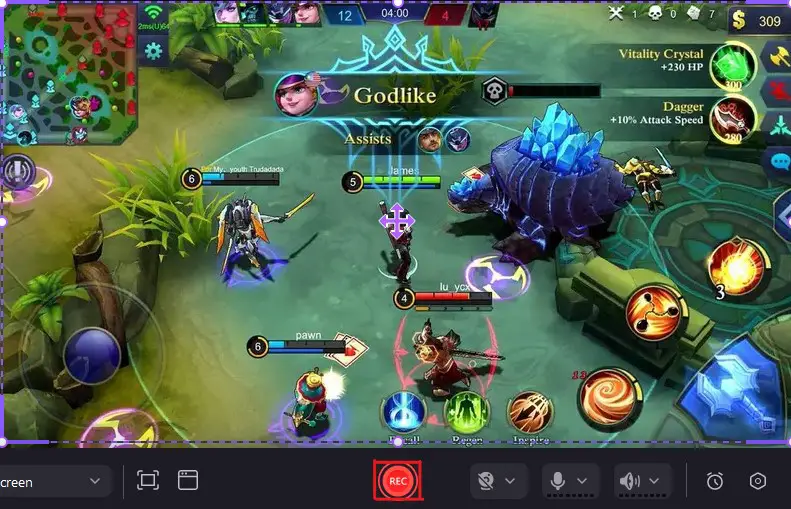
Once you’ve configured Wondershare DemoCreator for game recording, it’s time to capture your gameplay. Click the “Record” button within the software interface to initiate the recording process. To resume recording, click the “Resume” button or use the hotkey again.
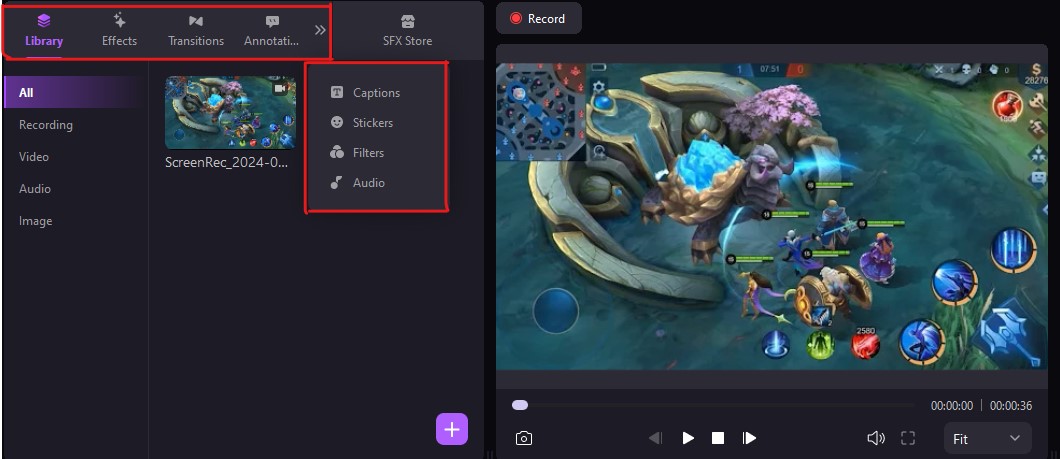
When you’ve finished recording your gameplay session, it’s time to stop the recording process. Click the “Stop” button within DemoCreator or use the designated hotkey to end the recording. Your captured gameplay footage will be automatically saved to your chosen destination folder.
Tips for High-Quality Footage
To capture engaging and high-quality gameplay footage, consider the following tips:
● Ensure adequate lighting in your gaming environment to enhance visibility and clarity.
● Maintain a steady framerate by optimizing your game settings and recording parameters.
● Use hotkeys or shortcuts to streamline the recording process and minimize interruptions.
● Experiment with different camera angles and perspectives to add variety to your footage.
● Narrate your gameplay or provide commentary to engage your audience and add personality to your videos.
Step 4: Editing Your Game Recordings

Once you’ve recorded your gameplay with Wondershare DemoCreator, it’s time to transform your raw footage into polished and captivating videos. DemoCreator offers a comprehensive suite of editing tools to enhance the quality of your game recordings. Here’s an overview of the editing tools available:
Effects and Transitions. Add visual flair to your gameplay videos with various effects and transitions. DemoCreator provides a range of effects, such as filters, overlays, and animations, to enhance the visual appeal of your footage.
Trimming and Splitting. Trim and precisely split your video clips to remove unwanted sections or create good transitions between scenes.
Audio Editing. Enhance the audio quality of your gameplay videos by adjusting volume levels, adding background music, or incorporating voiceovers.
Annotation and Text. DemoCreator offers a range of text styles, fonts, and colors to customize your captions and annotations, allowing you to provide valuable insights or highlight key moments in your gameplay.
Step 5: Sharing Your Gameplay Video
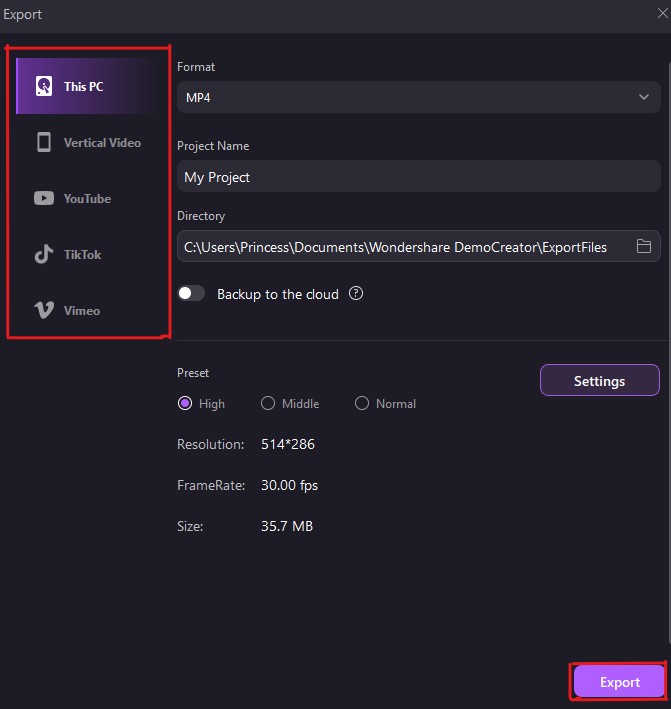
Now, it’s time to share your masterpiece with the world. Follow these steps to export your final video in various formats and share it on popular platforms like YouTube and Twitch:
Exporting Your Video. In Wondershare DemoCreator, navigate to the “Export” tab to access the export options. Choose the desired video format and resolution for your final output. DemoCreator offers a range of formats, including MP4, MOV, AVI, and more, ensuring compatibility with various devices and platforms.
Customizing Export Settings. Before exporting, you can customize advanced settings such as video bitrate, frame rate, and resolution to optimize the quality and file size of your exported video.
Uploading to YouTube. Simply click the “YouTube” button within the export menu to upload your video directly to your YouTube channel.
Sharing on Twitch. Navigate to the Twitch website or app and log in to your account. Click the “Upload” or “Create” button to start the upload process.
Conclusion
Wondershare DemoCreator allows you to easily capture and edit gameplay footage. Its user-friendly interface and powerful features make the entire journey from capturing gameplay to polishing the final video effortless. With its intuitive tools for setting up recordings, editing footage, and adding effects, DemoCreator empowers novice and experienced creators to easily produce high-quality gaming content. Whether showcasing your gaming skills or entertaining your audience, DemoCreator’s combination of simplicity and sophistication ensures that your gameplay videos stand out and captivate viewers.
Recording your gameplay like a pro is a journey that involves mastering both technical skills and creative flair. By following the tips and techniques outlined in this guide, you can elevate your gameplay recordings to the next level. Remember to choose the right software, optimize your settings for performance, and personalize your recordings with overlays and commentary. Engage with your audience, continuously refine your recording process, and never stop exploring new ways to improve. Whether you’re aiming to build a thriving community of viewers or simply looking to share your gaming adventures with friends, recording your gameplay like a pro opens up a world of possibilities. So, fire up your favorite game, hit that record button, and let your gaming prowess shine for the world to see. Happy gaming and happy recording!
